#CodeWeekly #6: SVG on the fly with Satori, Understanding Radix, and UI Libraries, New Series for System Design

Hello everyone, I apologize for the delay in releasing last week's update. To better serve the readers, I've been working on improving the blog structure based on your feedback. Many of you suggested separating system design posts from the #CodeWeekly series, and I completely agree with this. For clearer insights into system design alongside weekly code updates, we're launching a dedicated System Design Series.
This series will showcase in-depth explorations of various system design topics, helping you understand and implement them effectively. Stay tuned for more insightful dives into different system design areas in the coming weeks!
I encourage you to actively participate in the series by asking questions, sharing your experiences, and engaging in discussions. Together, we can build a valuable resource for anyone interested in mastering system design principles.
Turning HTML and CSS to SVG using Satori in Next.js
What is Satori by Vercel?
Satori, developed by Vercel, is an "enlightened library", as they say, it is designed to convert HTML and CSS into Scalable Vector Graphics (SVG) that can be used further to create dynamic content from HTML out-of-the-box and can be also converted to different usable file formats like PNG, JPEG, and PDF (when used with other libraries).
It aims to provide a clear and efficient way to generate visual representations of web content on the fly. It offers several key features:
Satori takes your existing HTML and CSS code and translates it into an SVG image.
By default, it embeds font path data within the SVG, eliminating the need for separate font files.
Usable in browsers, Node.js, and Web Workers, providing flexibility in integration.
While typically relying on asm.js in the browser and native modules in Node.js, you can optionally use WebAssembly (WASM) for improved performance.
Generating dynamic files from inputs when used with frameworks like Next.js or Astro.js, eg. Vercel OG.
Read more: Open Graph (OG) Image Generation (vercel.com)
How to use Satori with Next.js 14?
Using Satori directly in a Next.js application is a bit complex as it involves working on the client side as well as the server side.
First, you'll need to upload the font file in WOFF format in the public folder of your Next.js repository.
Now, let's create a server action file for returning the SVG file from the server.
File:/src/app/action.ts'use server'; import satori from "satori"; export async function generateSVG(obj: any, width: number, height: number){ const poppins = await fetch(process.env.NEXT_PUBLIC_URL + "/fonts/Poppins-Medium.ttf").then((r) => r.arrayBuffer()); const options: any = { fonts: [ { name: "Poppins", data: poppins, weight: 400, style: "normal", letterSpacing: 0, }, ], wordWrap: "on", tabSize: 2, minimap: { enabled: false, }, smoothScrolling: true, cursorSmoothCaretAnimation: "on", contextmenu: false, automaticLayout: true, width: width, height: height, }; const _result = await satori( obj, options ); // console.log(_result); return _result; }Now, let's add the rest of configurations in
page.tsxfile.import Link from "next/link"; import { generateSVG } from "./action"; export default async function Home() { // const [objectURL, setObjectURL] = React.useState<string>(""); // const data = username; const data = "Aryan Chaurasia"; const [width, height] = [1130, 800]; const obj = (( <div style={{ display: 'flex', height: '100%', width: '100%', alignItems: 'center', justifyContent: 'center', flexDirection: 'column', backgroundImage: 'linear-gradient(to bottom, #dbf4ff, #fff1f1)', fontSize: 60, letterSpacing: -2, fontWeight: 700, textAlign: 'center', }} > <div style={{ backgroundImage: 'linear-gradient(90deg, rgb(0, 124, 240), rgb(0, 223, 216))', backgroundClip: 'text', '-webkit-background-clip': 'text', color: 'transparent', }} > {data} </div> <div style={{ backgroundImage: 'linear-gradient(90deg, rgb(121, 40, 202), rgb(255, 0, 128))', backgroundClip: 'text', '-webkit-background-clip': 'text', color: 'transparent', }} > Preview </div> <div style={{ backgroundImage: 'linear-gradient(90deg, rgb(255, 77, 77), rgb(249, 203, 40))', backgroundClip: 'text', '-webkit-background-clip': 'text', color: 'transparent', }} > Ship </div> </div> )) const _result = await generateSVG(obj, width, height); // console.log(_result); return( <div className="flex justify-center"> <div className="mx-auto text-center"> <h1>Generate Certificate</h1> <div className="mx-auto" dangerouslySetInnerHTML={{ __html: _result }} /> </div> </div> ); }With the SVG rendered in the server action, we can embed the SVG file directly on the client slide without rendering it on server-side.
So, that was it for the code. You can visit Vercel OG Image Playground (og-playground.vercel.app) for more.
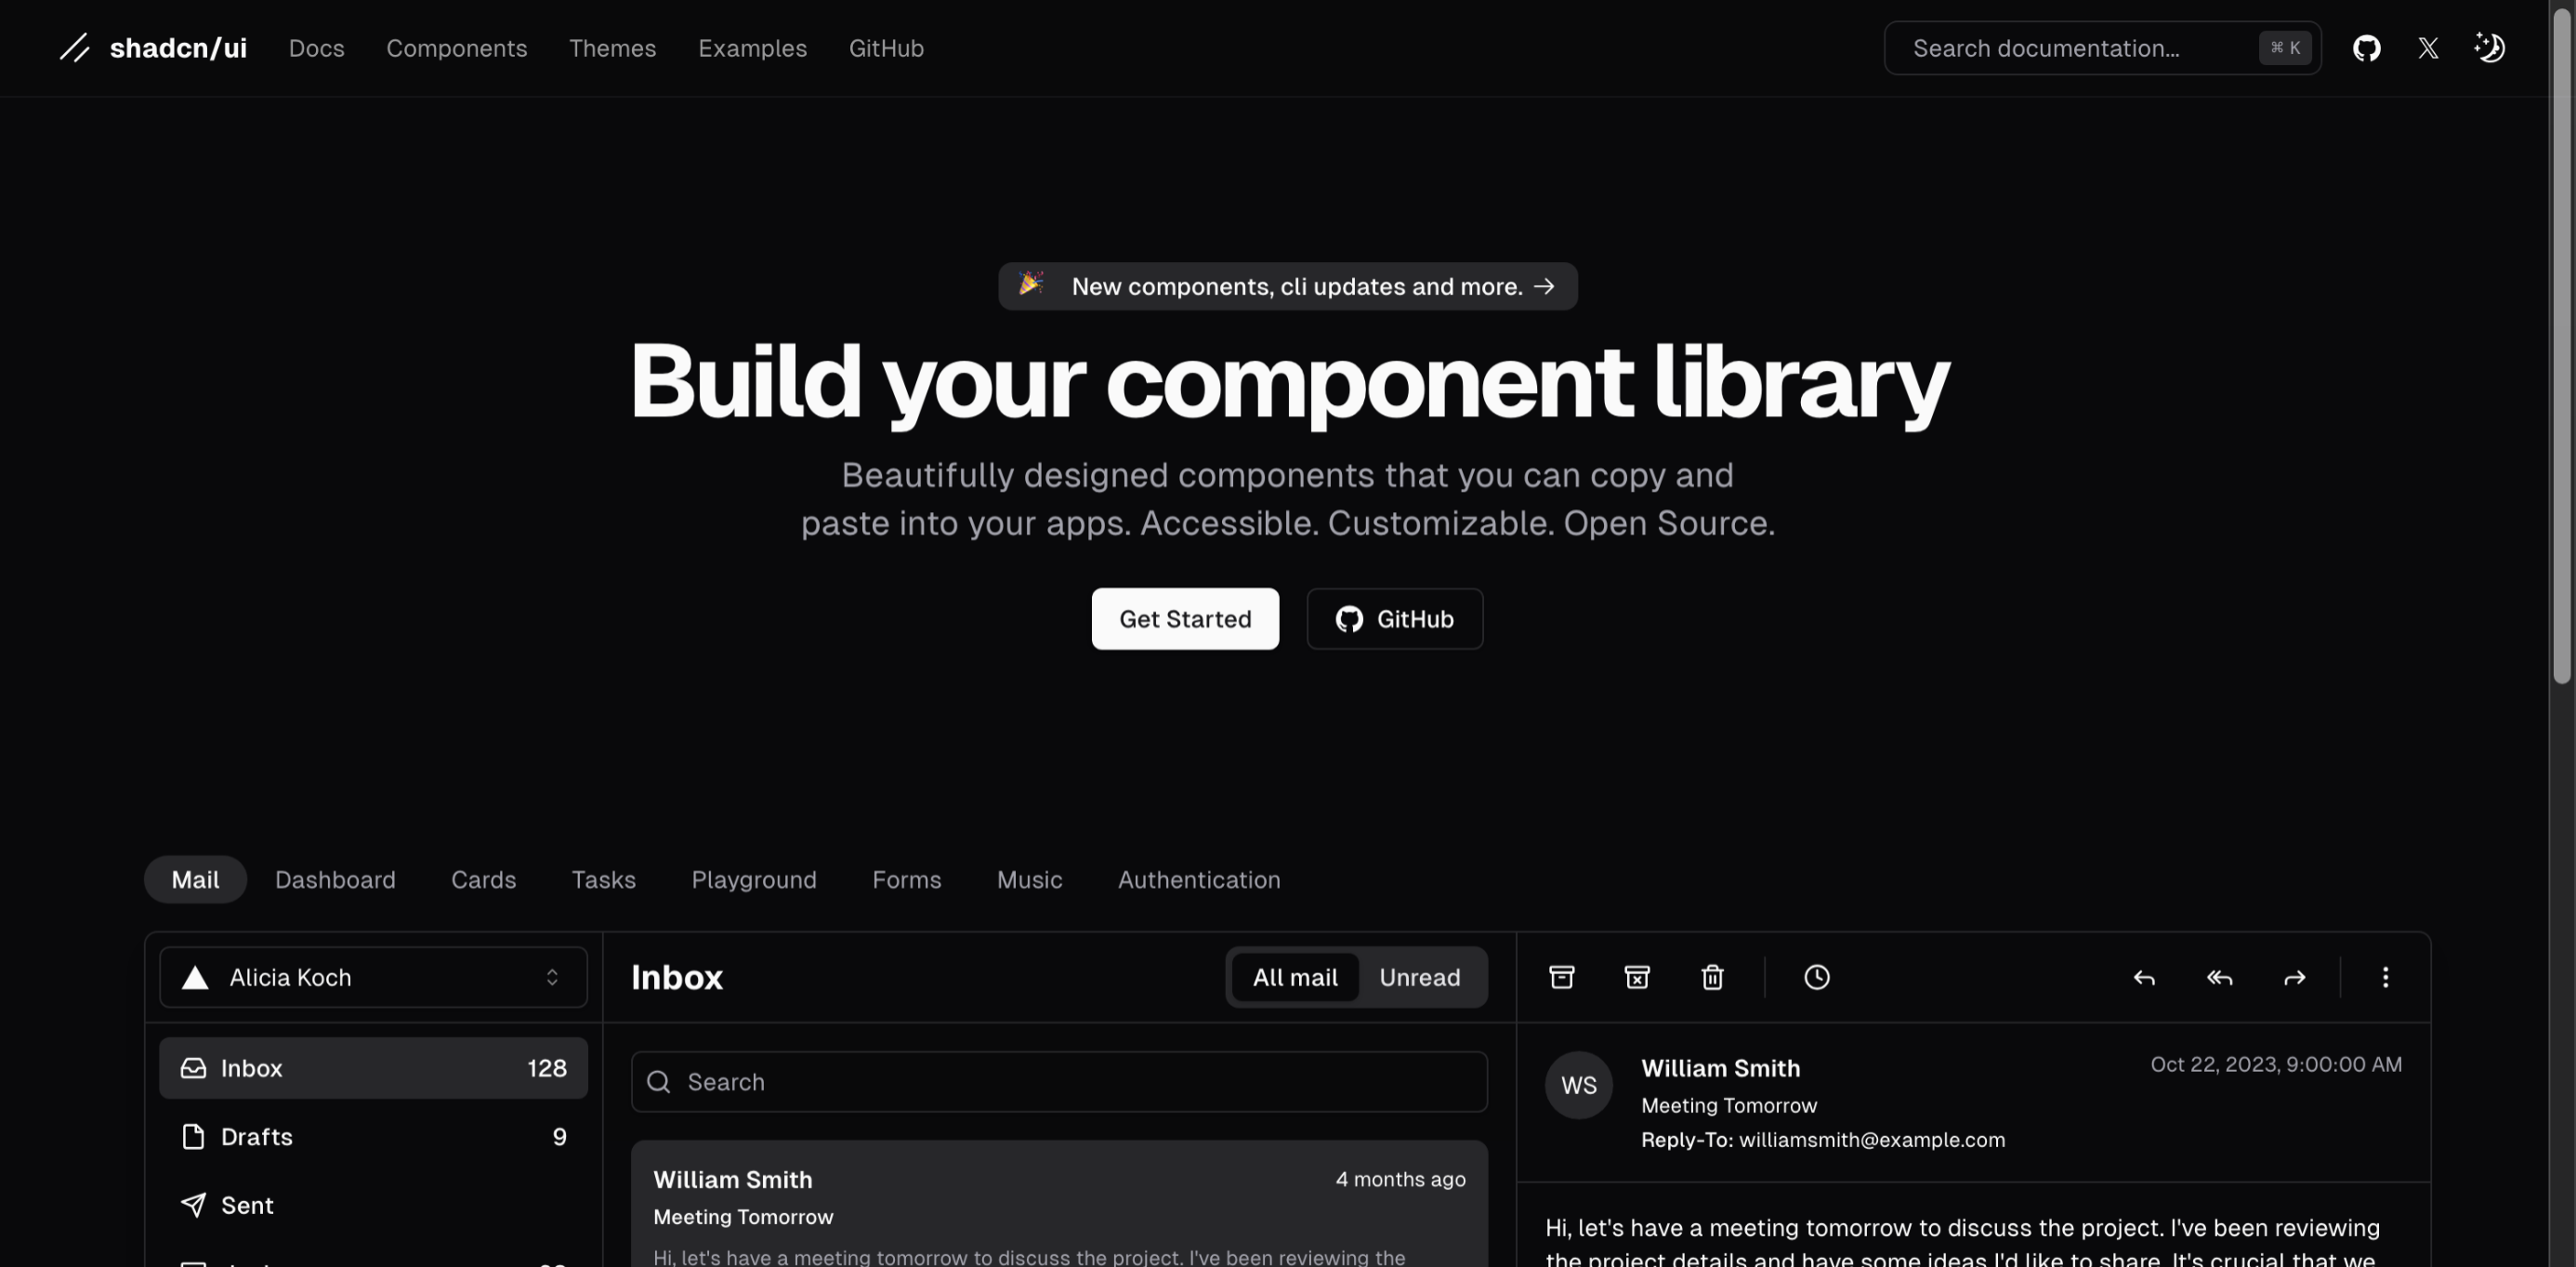
Radix UI: The Open-source standards for designing UI primitives
Radix UI is a library of low-level, unstyled components designed to be the building blocks of your web applications. Unlike opinionated libraries (Bootstrap, Ant Design, Material UI) that dictate styles and layout, Radix empowers you to take full control of the visual presentation, allowing you to seamlessly integrate it into your existing design system or create something entirely new.

While Radix offers a rich set of pre-built components, its true power lies in its composability. You can combine and customize these building blocks to create complex and interactive elements like accordions, dialogs, and date pickers.
For those seeking to push the boundaries, Radix offers a treasure trove of advanced techniques:
Tree shaking and code splitting: Optimize your bundle size for lightning-fast loading times.
Integration with third-party libraries: Seamlessly integrate animation libraries or state management solutions.
Building your own design system: Leverage Radix as the foundation for a consistent and maintainable design language.
Radix UI is used to create reusable components combined with Tailwind CSS. Some of examples of such components are shadcn/ui and medusajs/ui.
Conclusion
In conclusion, Radix UI is not just another interface design framework – it's a game-changer for developers looking to speed up their development process. Using its streamlined workflow, developer-centric customization, optimized performance, and forward-thinking toolkit, Radix UI is setting a new standard for interface design and paving the way for the future of digital innovation.
Coming to Satori, not only allows us to create dynamic images on the fly, but it is far more useful than just creating SVGs for the images. In the coming days, we can see some very useful tools coming out based on Satori.
So, that was the end for today's release, I'm looking forward to share some amazing tips on system design as well as recent changes in the world of AI and Web Development. Till then, ADIOS!